
Practice Portal · Setup guide
Connecting your first client
Seven short steps. One client. About five minutes, and you only do the sign-up once.
← → move between steps · O see every step
Step 1 of 7
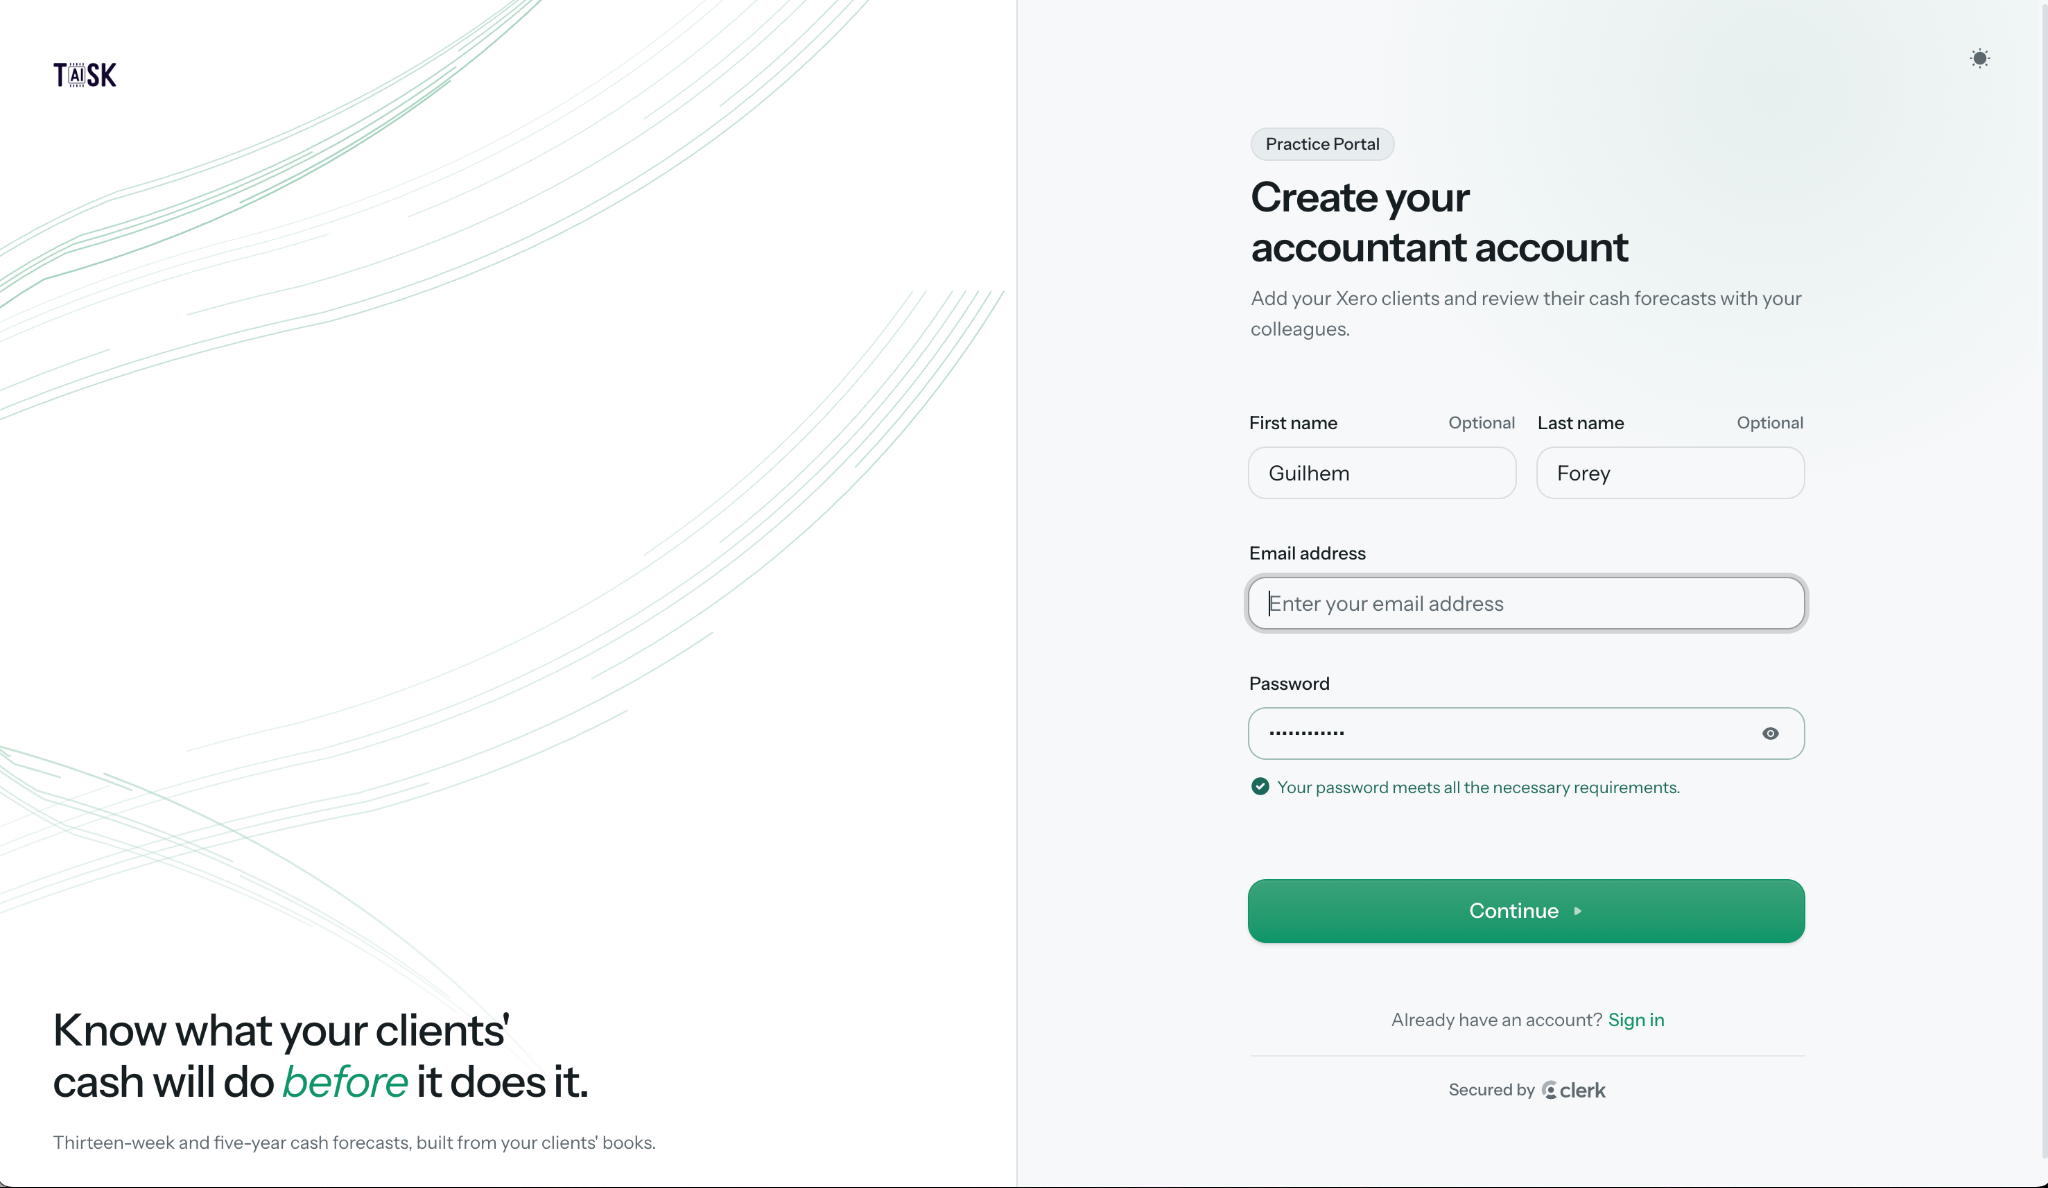
Create your account
Open the Practice Portal and sign yourself up.
- Go to practice.taisk.com/login.
- Type your first name and last name.
- Enter your work email address — this is where your code will be sent.
- Choose a password, then click Continue.
Tip Use your work email, not a personal one. Every colleague signs up with their own account.
Step 2 of 7
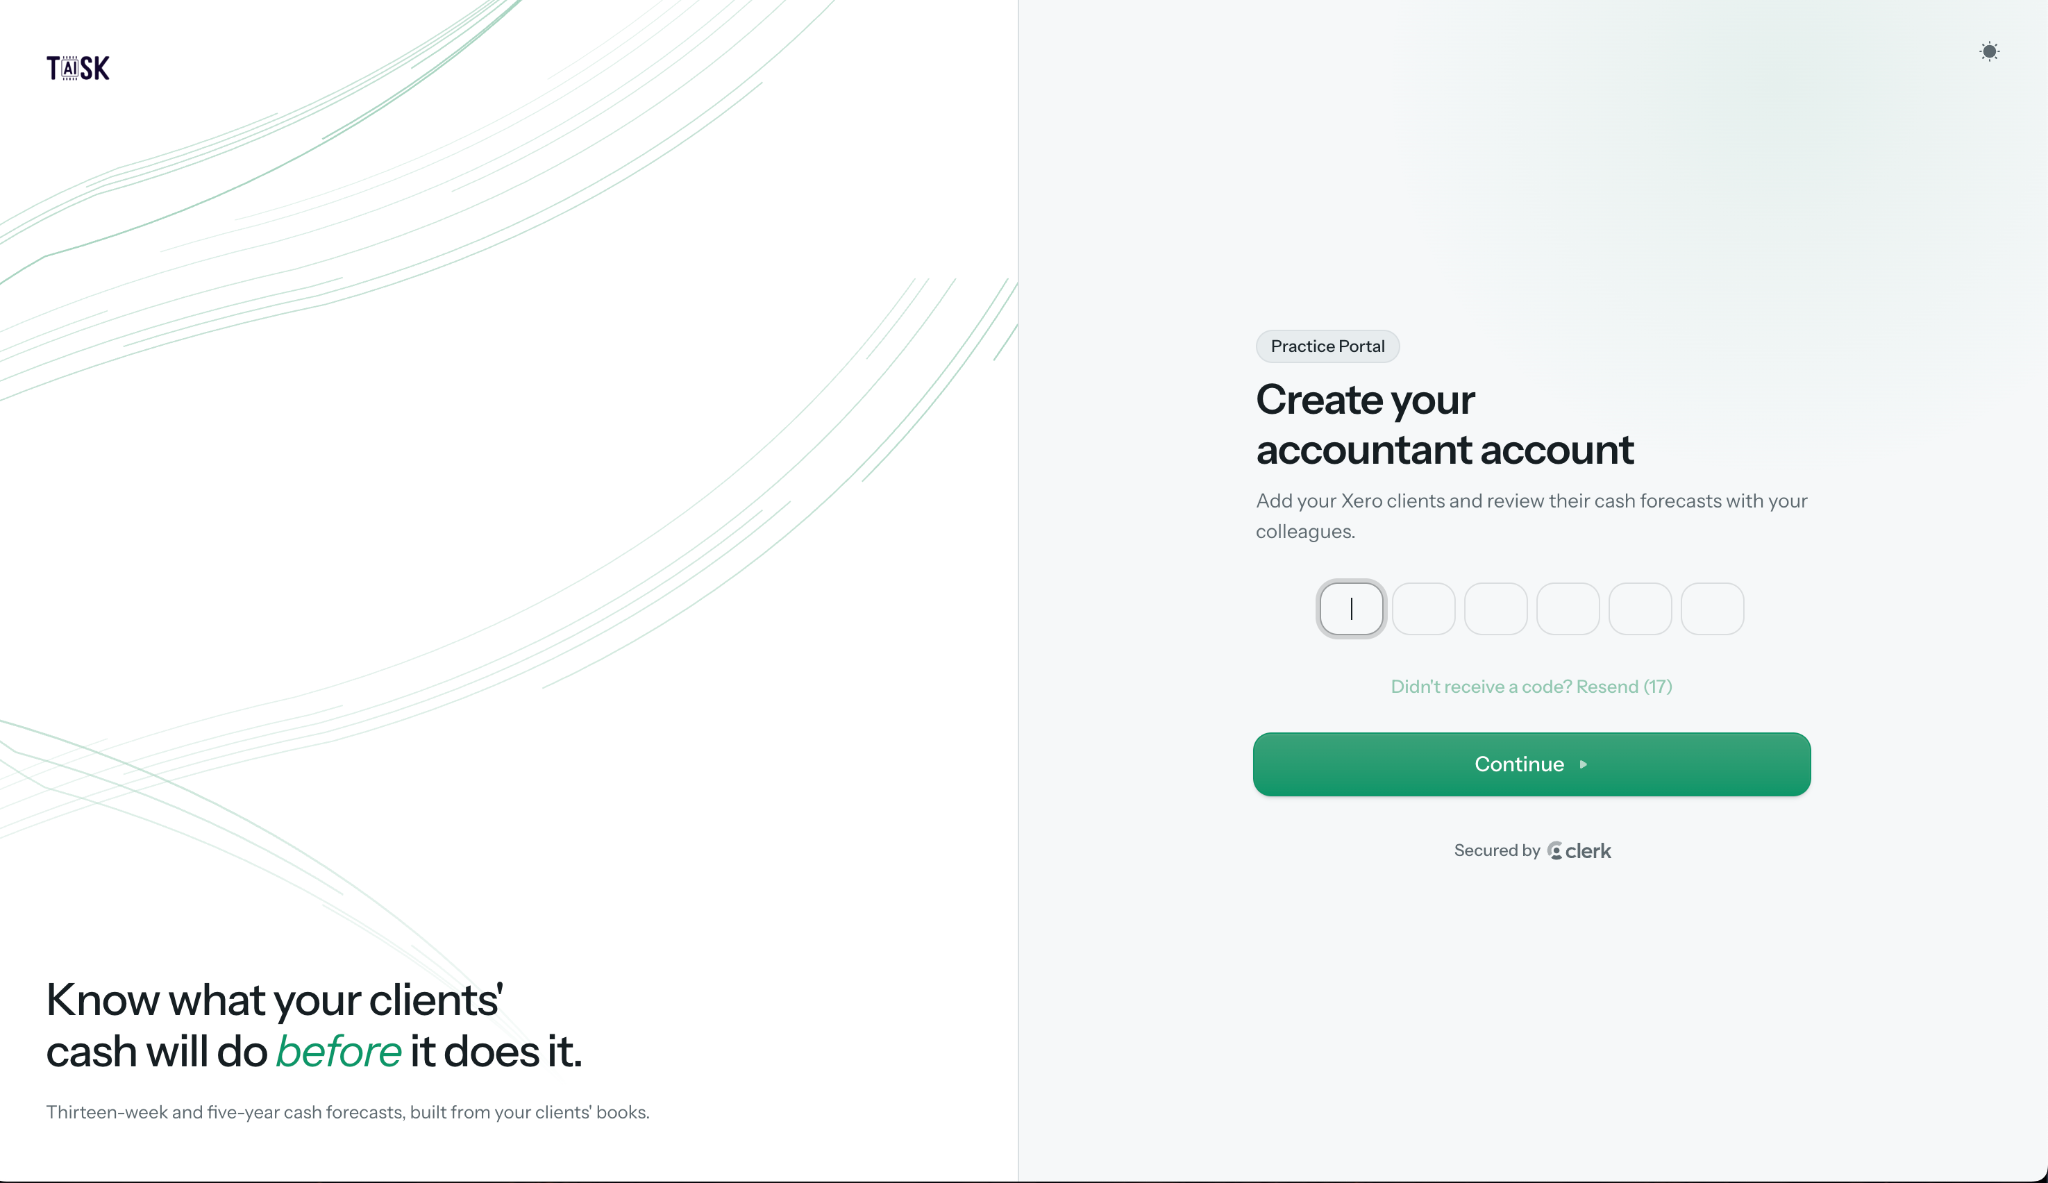
Enter the code from your email
A short six-digit code arrives by email to prove the address is yours.
- Open your inbox for the address you just used.
- Find the newest email from TAISK. The subject line mentions your code.
- Type the six digits into the boxes, then click Continue.
Nothing yet? Give it a minute, then click Resend once the countdown finishes. If it still doesn't arrive, look in your spam or junk folder.
Step 3 of 7
Choose your accounting software
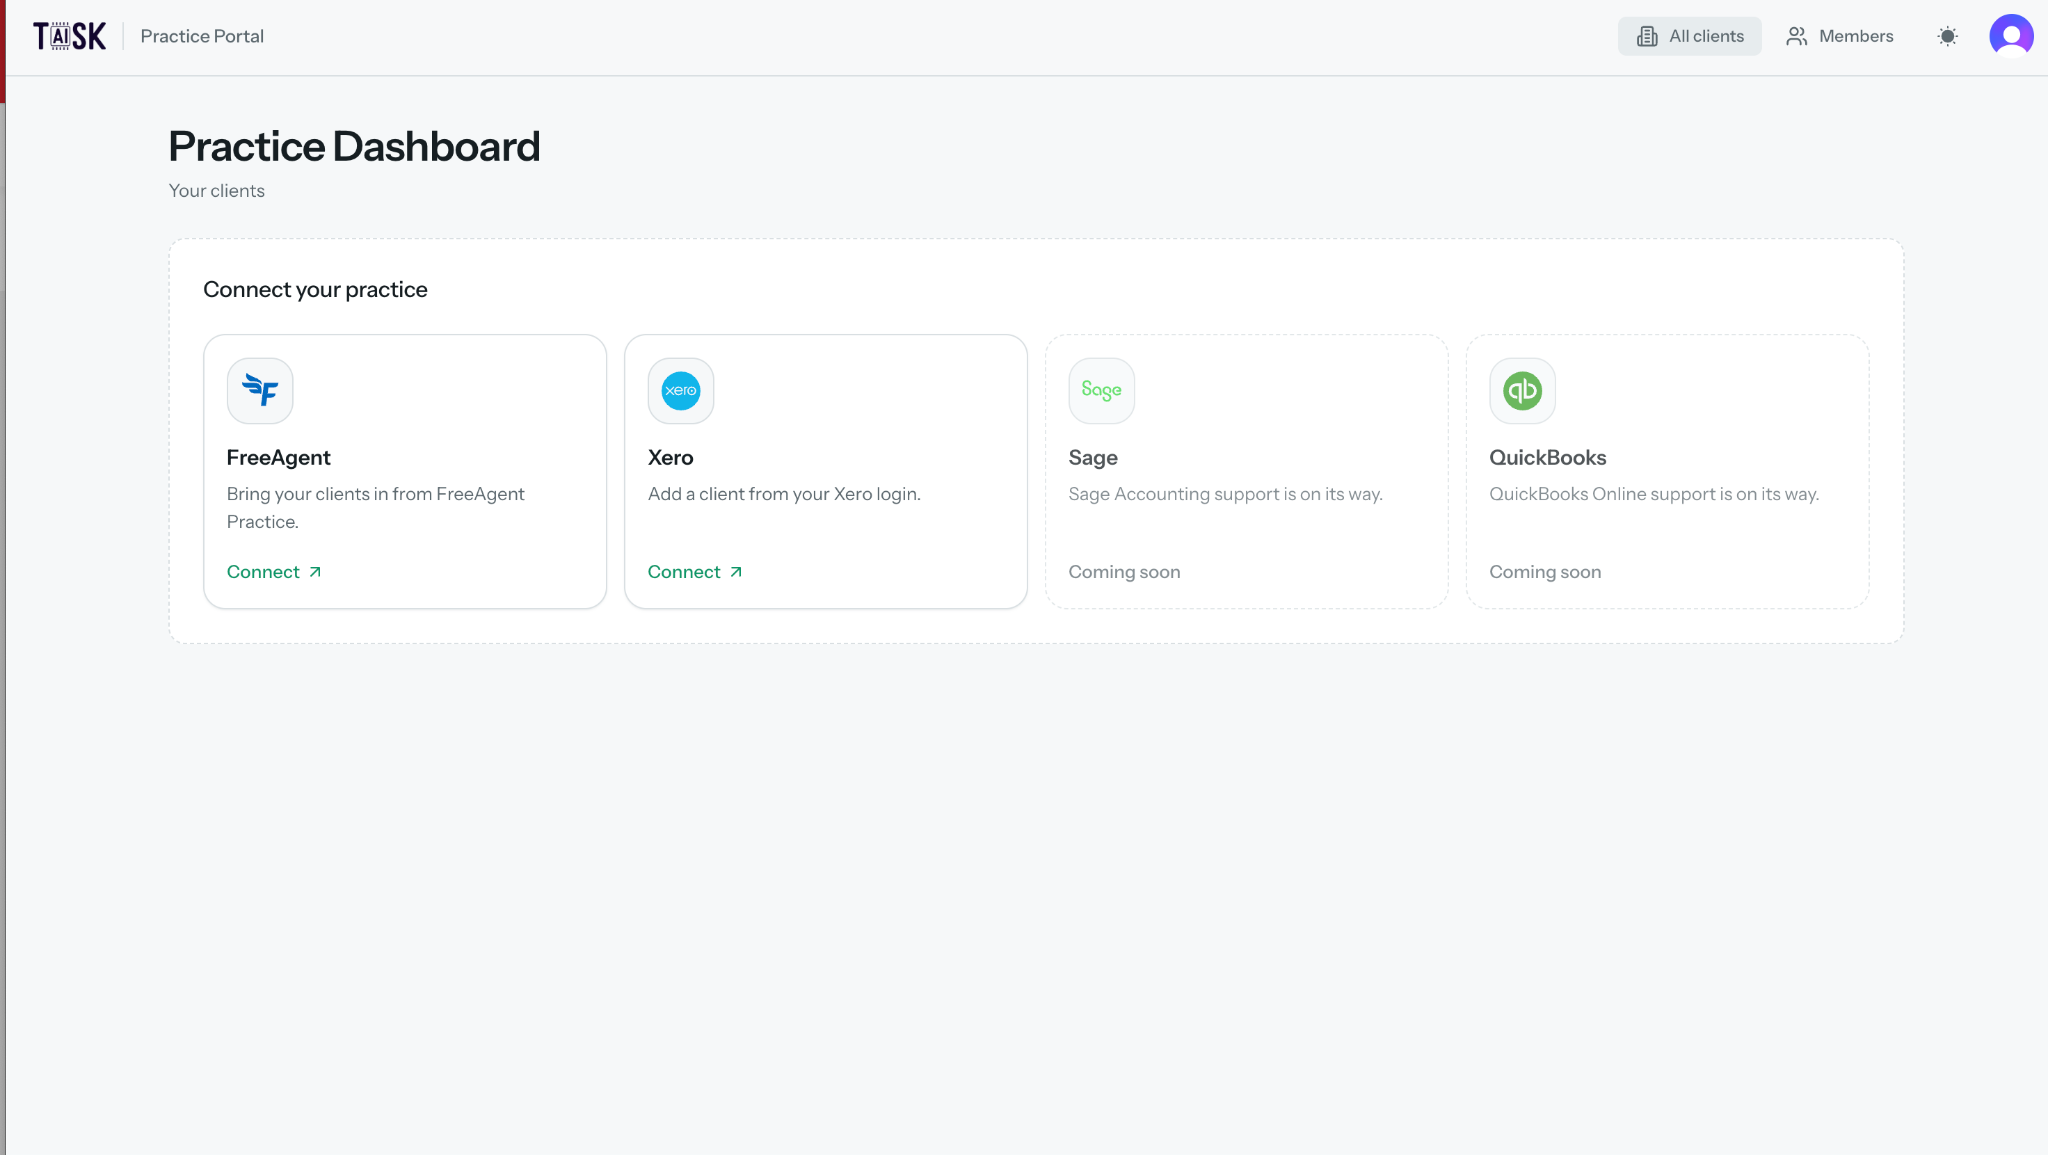
The Practice Dashboard is your home from now on. Under Connect your practice, pick the software your client keeps their books in.
- Find the Connect your practice panel.
- Click Connect on the Xero card.
- FreeAgent works the same way. Sage and QuickBooks are coming soon.
Good to know Each client is connected on its own. You'll come back to this panel every time you add another one.
Step 4 of 7
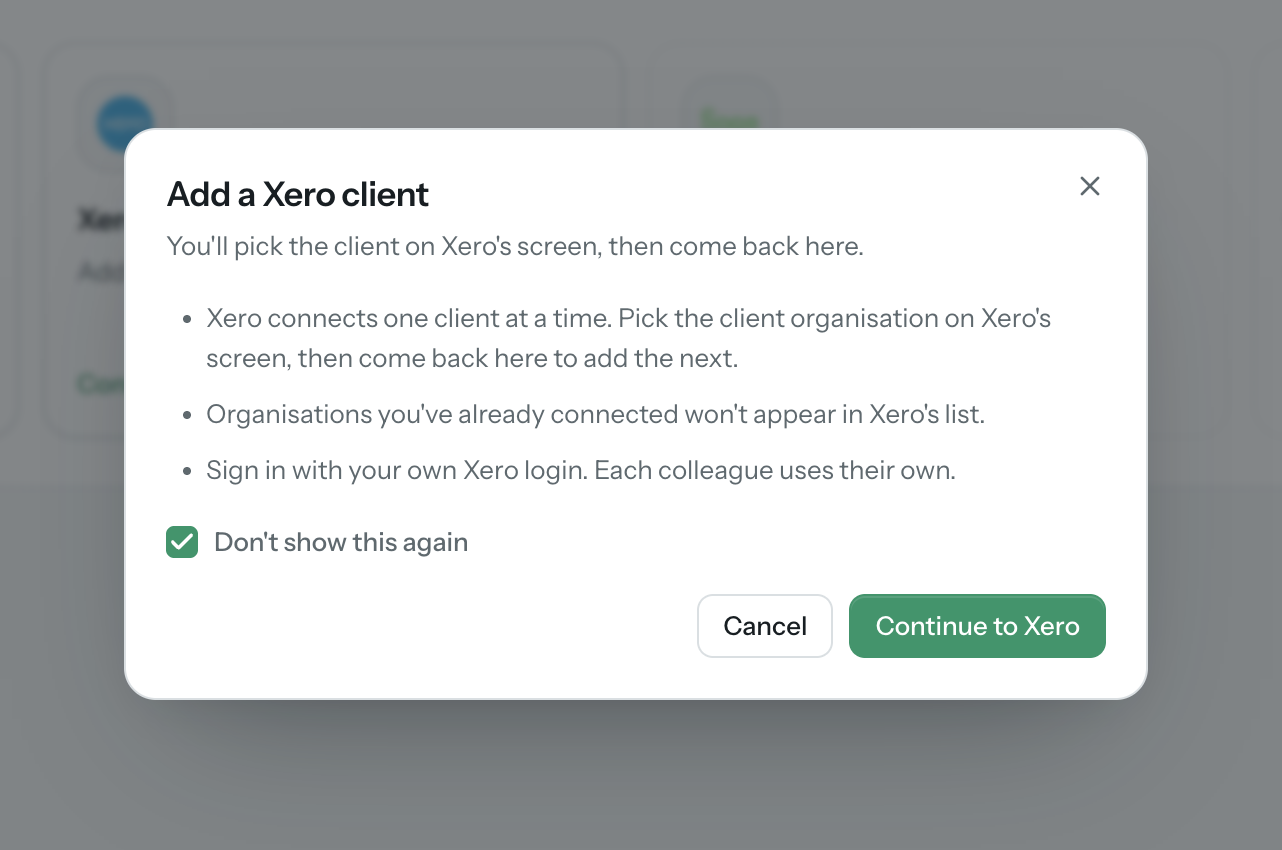
Continue to Xero
A short message explains how the connection works before you leave TAISK.
- Read the three points — one client at a time, already-connected organisations are hidden, and you sign in with your own Xero login.
- Tick Don't show this again so it skips next time.
- Click Continue to Xero.
Careful You're about to leave TAISK and land on Xero. If the Xero sign-in page appears, use your own Xero details — not the client's.
Step 5 of 7
Pick the client in Xero
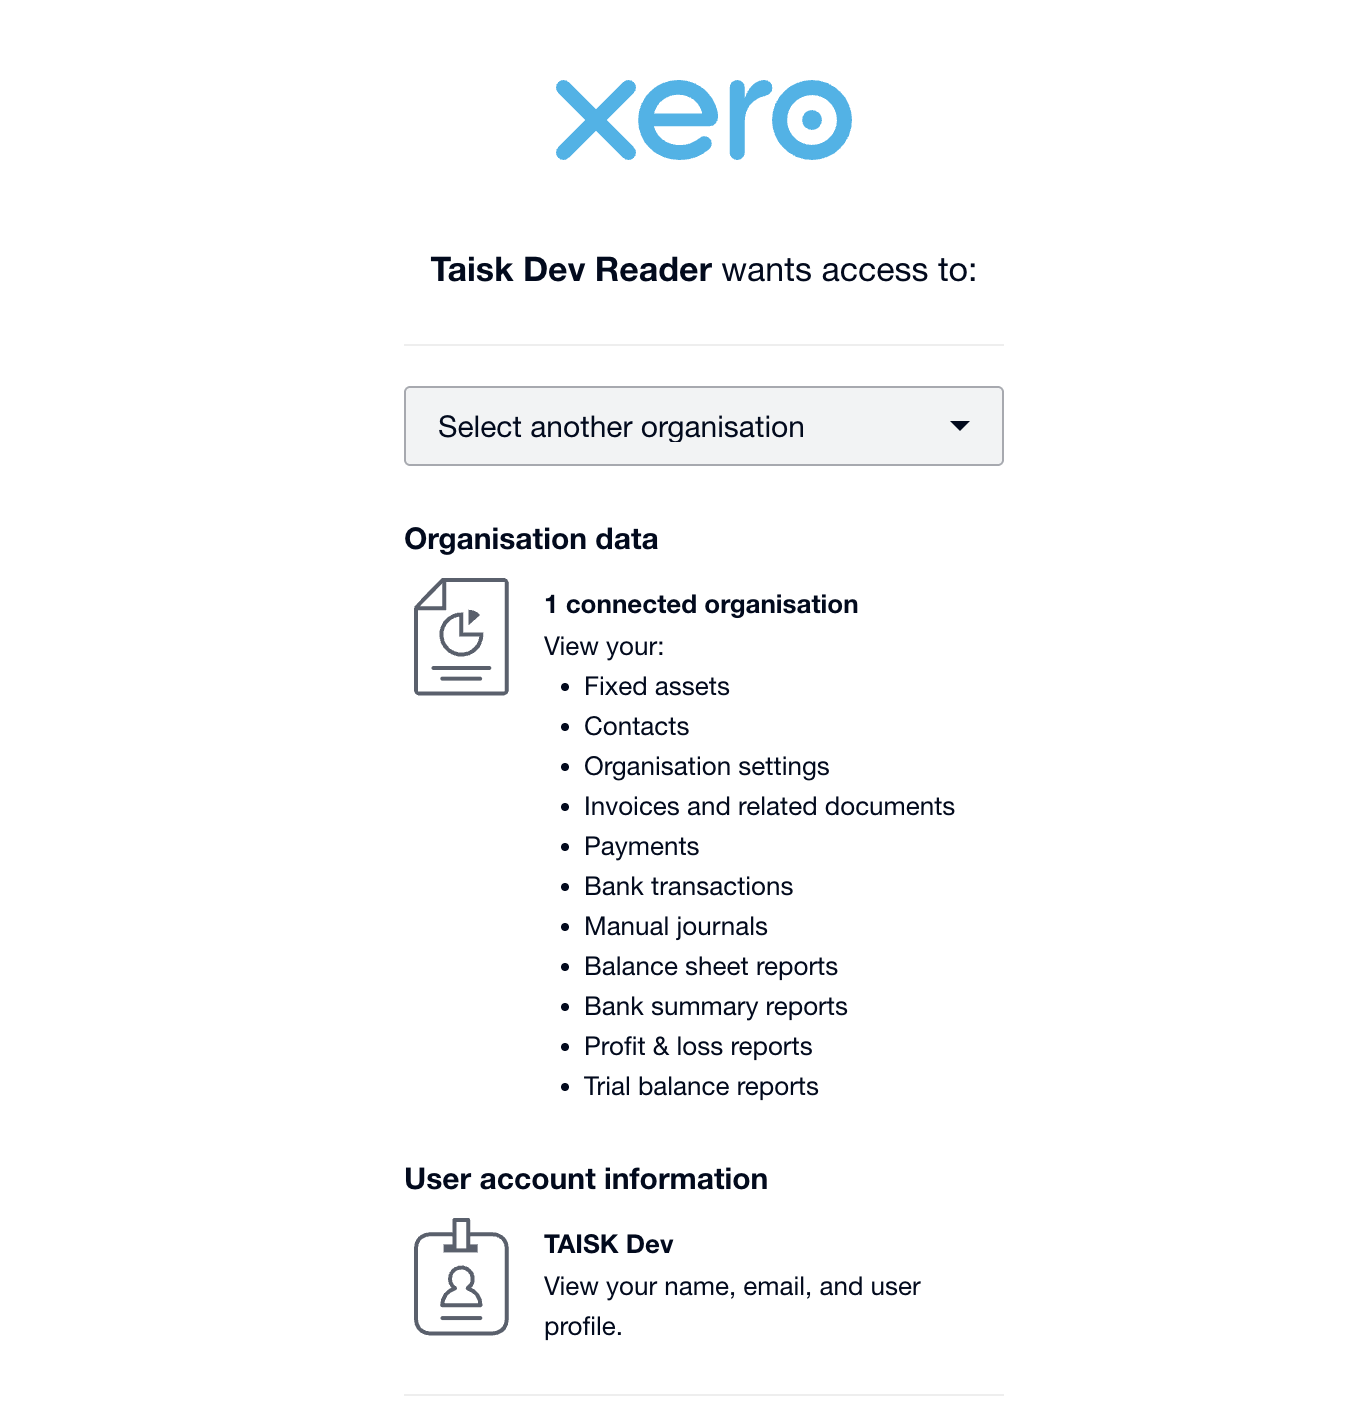
This page is Xero's, not ours. It asks which organisation TAISK may read.
- In the Select another organisation dropdown, choose the client you want to add.
- Give it a second to load. The list of permissions will refresh.
- Check the name matches the client, then move to step 6.
Why is a client missing? Organisations already connected to TAISK don't appear, and neither do organisations your Xero login can't reach.
Step 6 of 7
Approve access
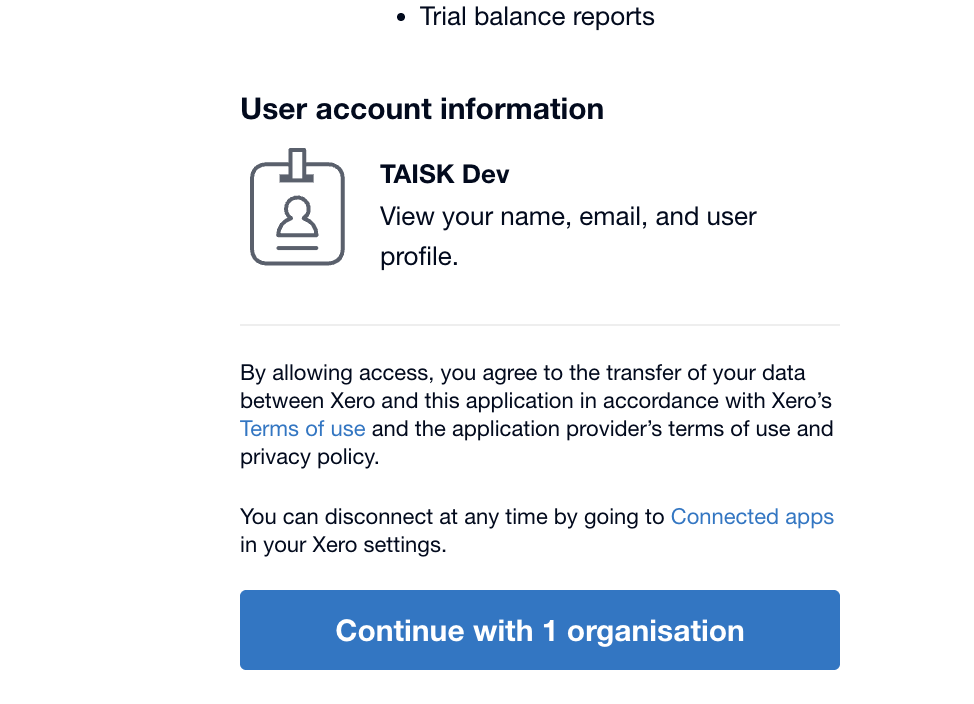
Scroll to the bottom of the Xero page and confirm the connection.
- Scroll down past the list of reports Xero will share.
- Click the blue Continue with 1 organisation button.
- You'll be brought straight back to your TAISK Practice Dashboard.
Reassurance TAISK can read your client's books. It can't change anything in Xero, and access can be removed at any time from Xero's Connected apps page.
Step 7 of 7
Confirm the client has been added
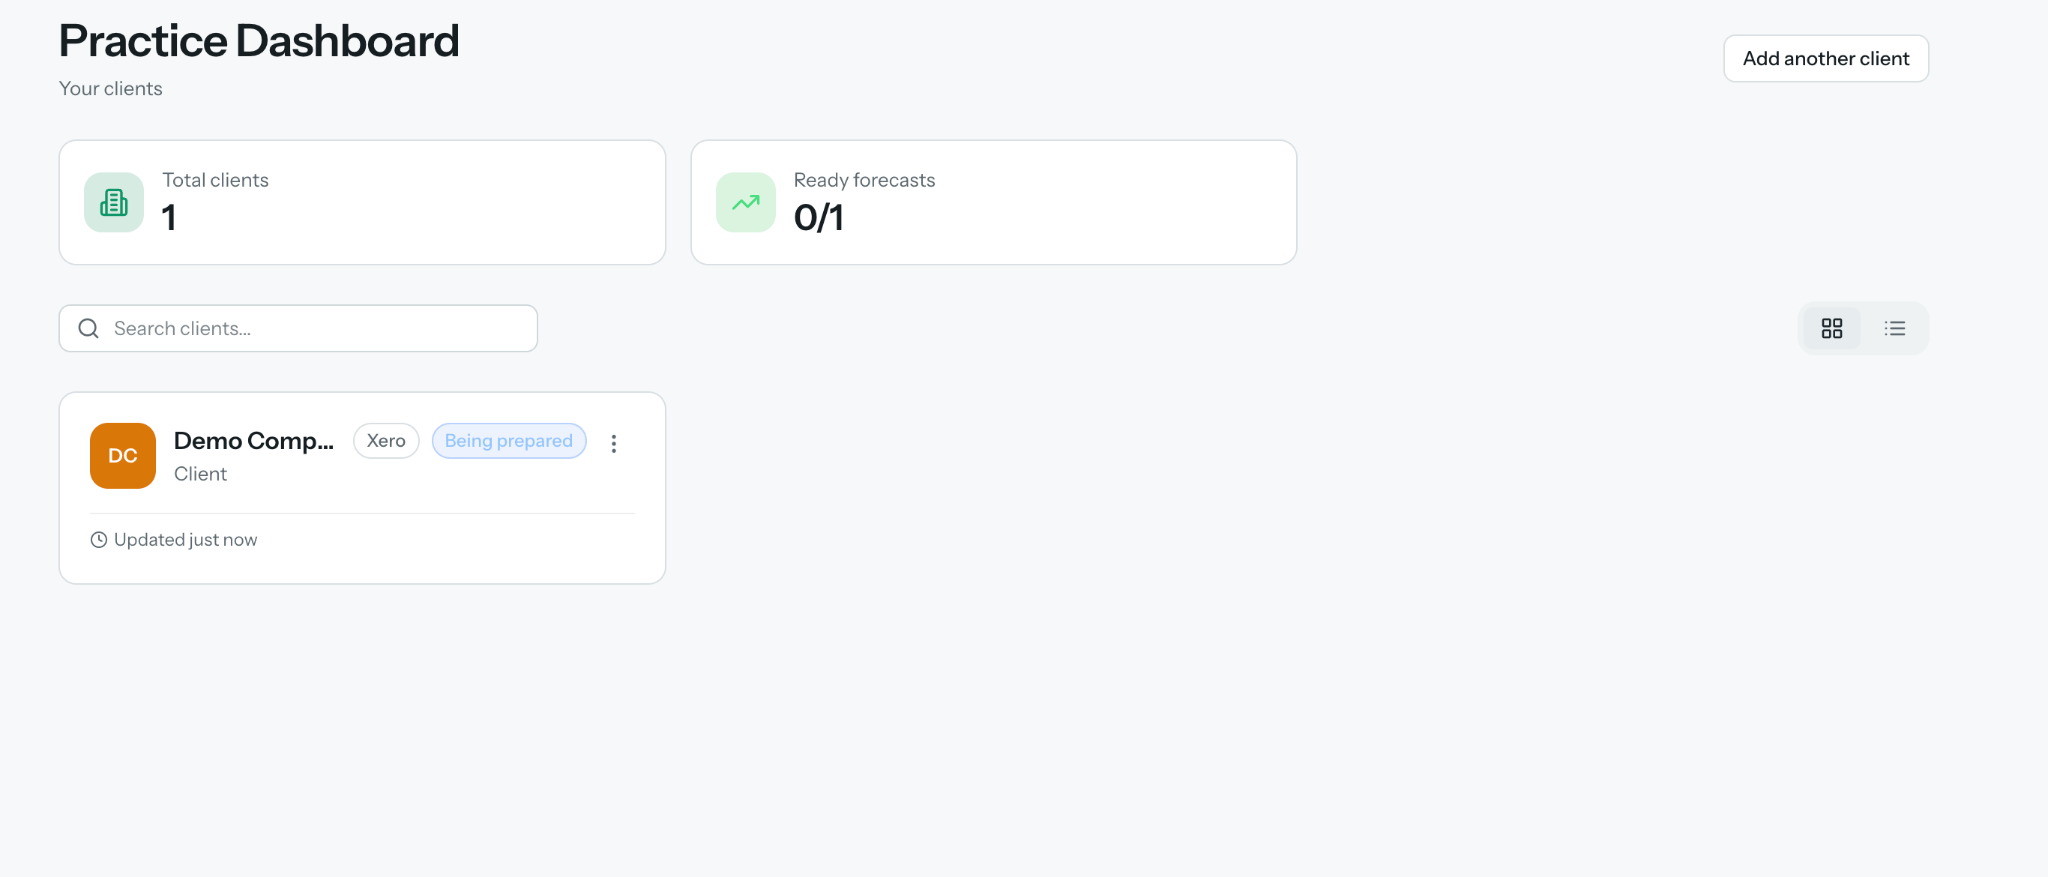
Back on the dashboard, the client appears with a Being prepared label.
- Check the client is listed under Your clients.
- Leave it alone — TAISK is building the first forecast in the background.
- You'll be emailed when it's ready to review.
Next client Click Add another client and repeat from step 4. Everything else stays the same.
All done
That's the whole flow.
You signed up, connected a client through Xero, and the first forecast is being built. Adding the next client only takes steps 4 to 7.
- Create your account
- Enter the email code
- Choose your software
- Continue to Xero
- Pick the client
- Approve access
- Confirm the client
If something looks different
Refresh the page and start again from step 3. A client can be added again at any time, and nothing is lost by closing the guide halfway through.